
Quick Answer: Connecting Shopify to Meta Ads requires four jobs done in order: install the Facebook & Instagram by Meta sales channel from the Shopify App Store, link your Meta Business Manager and Ad Account, set data-sharing to Maximum to activate the Conversions API, and verify your domain so iOS conversions report correctly.
The Shopify-installed channel handles the wiring, but four post-install items decide whether your Pixel actually optimizes toward profit on Printify and Printful margins: domain verification, Aggregated Event Measurement, the catalog feed, and a Pixel test.
This guide walks the full setup, then covers the post-connection tracking layer POD operators need before turning on spend — itemized fulfillment costs, profit-per-order, and the cross-channel attribution that Meta-only reporting will quietly miss.
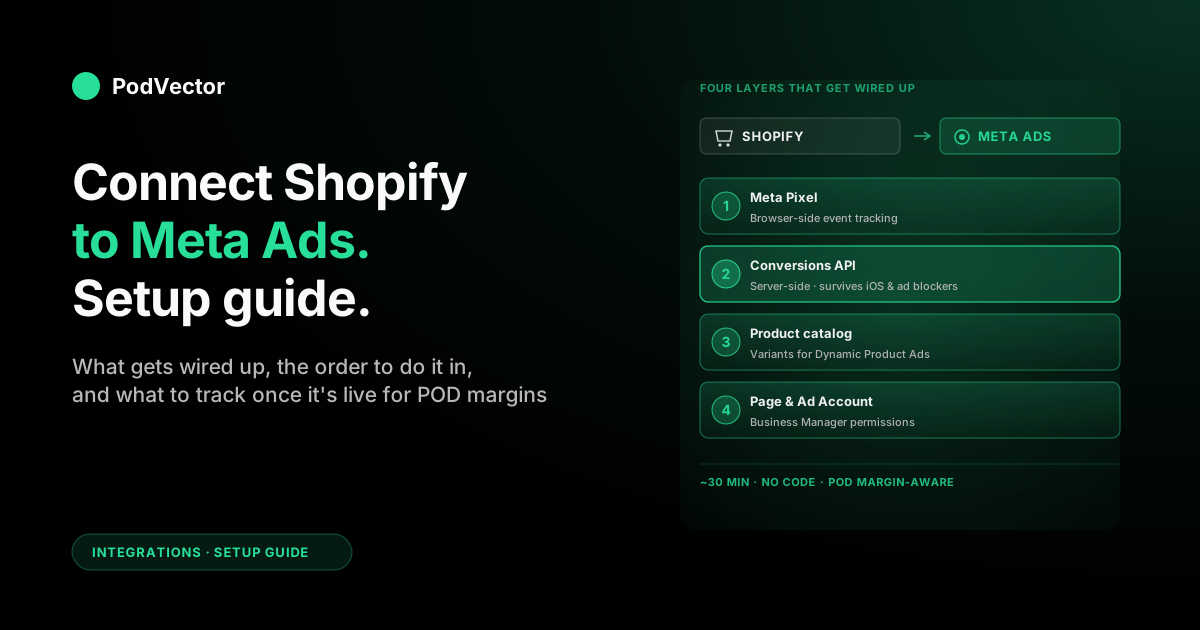
What actually gets connected
Generic tutorials say "connect Shopify to Meta Ads" as if it were one toggle. It isn't. Four distinct pieces get wired up when you install the integration, and each one fails differently if you skip a step. (For the wider context of how this fits with other ad integrations, see our Meta Ads integrations hub and the broader Meta Ads for POD topic hub.)
Knowing what each piece does tells you what to test after setup — and what to fix when something looks off.
1. The Meta Pixel (browser tracking)
A small JavaScript snippet that fires events from the shopper's browser: PageView, ViewContent, AddToCart, InitiateCheckout, Purchase. Shopify installs it automatically once the channel is connected. No code touch on your theme.
The catch: iOS, ad blockers, and privacy extensions strip a meaningful share of these events before they ever reach Meta. The Pixel alone is no longer enough — see our deeper walkthrough on the Meta Pixel for Shopify setup for the configuration details.
One important note: when you run the Pixel and Conversions API simultaneously — which is the recommended approach — Meta requires deduplication. If both the Pixel and CAPI report the same order, Meta needs a shared event ID to recognize they are the same sale, not two separate purchases. Shopify's native integration handles this automatically, but if you layer in a third-party app or manual CAPI implementation, confirm deduplication is configured.
2. The Conversions API (server tracking)
Shopify's server sends the same events directly to Meta, bypassing the browser. This is what survives iOS 14.5+ and ad blockers. It's also where event match quality jumps, because Shopify forwards hashed customer data (email, phone, billing address) that the browser-side Pixel often lacks.
The Conversions API is not a separate install — it switches on when you set Shopify's data-sharing level to Maximum in step 3 below.
3. The product catalog
Your Shopify product feed syncs to Meta's Commerce Manager so you can run Dynamic Product Ads (the retargeting ads that show the exact mug or shirt someone looked at). Variants, prices, images, and inventory all flow through.
For POD stores, this is where most catalog issues start — Printify and Printful variants can sync with stale prices or out-of-stock states if you don't audit the feed manually after first connection.
4. The Facebook Page and Ad Account permissions
The integration links your Shopify store to a Facebook Page and a Business Manager Ad Account. Without this link, you can install the channel but not actually run ads — Meta won't let your Page advertise from an Ad Account it doesn't own.
If your Page and Ad Account aren't already inside the same Business Manager, the wizard will fail at step 2. Fix the Business Manager hierarchy first.
Prerequisites before you start
Have these ready in this order. Missing any one of them turns the 30-minute setup into a multi-hour rabbit hole.
A Meta Business Manager account
Sign up at business.facebook.com if you don't have one. If your store currently runs ads off your personal Facebook account, stop. Migrate to Business Manager before you connect Shopify — you'll regret it later when handing access to a freelancer or VA.
A Facebook Page owned by that Business Manager
The Page that will appear as the "advertiser" on every ad. The store name is fine. Page must be inside Business Manager (not just admin'd by you personally) for the connection to work cleanly.
A Business Manager-owned Ad Account with payment
Don't reuse a personal ad account. Personal ad accounts work in spurts but break attribution and access permissions over time. A fresh Business Manager Ad Account with a working payment method is the only configuration that interoperates cleanly with Shopify.
Admin access to both sides
Your Shopify admin email should match (or have shared Business Manager admin rights with) the Facebook account you'll authenticate with. Mismatched permissions are the most common reason "Connect account" silently fails.
Your apex domain
Know whether your store runs on yourstore.com or shop.yourstore.com. Domain verification needs the apex domain (the root, no subdomain). Mixing the two breaks Aggregated Event Measurement later.
The four setup steps
This is the condensed version. For an exhaustive screen-by-screen walkthrough, see the companion guide on how to connect your Shopify store to Meta Ads step-by-step.
Step 1 — Install the Facebook & Instagram by Meta sales channel
From your Shopify admin, go to Settings → Apps and sales channels → Shopify App Store. Search for Facebook & Instagram by Meta. Install the official Meta-published app, not a look-alike.
Note: you no longer need a specific Shopify plan to use the channel — any active store with the right Meta assets can connect. Once installed, the channel appears under Sales channels in your Shopify admin.
This installs the integration framework only. Nothing is connected yet.
Step 2 — Link your Business Manager and Ad Account
Open the newly installed channel from Shopify's left nav. Click Start setup on Facebook Marketing (the only piece you need for ads — the Shop and Marketplace tiles are separate decisions).
Sign in to Facebook, then select your Business Manager, Page, Ad Account, and Pixel (Meta now calls the Pixel a "dataset" in some interfaces — it is the same thing). If no Pixel exists, the wizard creates one — give it an explicit name like Yourstore Pixel so it's identifiable later. Use one deliberate setup route and document which business assets you selected; duplicate pixels or catalogs make diagnosis significantly harder later.
Step 3 — Set data-sharing to Maximum
This is the step generic tutorials skip and the one that decides whether your Pixel post-iOS even works. The wizard offers three data-sharing levels:
- Standard: browser-side Pixel only. iOS and ad blockers strip events.
- Enhanced: browser-side with hashed customer data added. Better matching, still browser-only.
- Maximum: Shopify's server forwards events via the Conversions API. Survives iOS, ad blockers, and cross-device sessions.
Pick Maximum. If you missed it during initial setup, change it now: Facebook & Instagram channel → Settings → Data sharing → Maximum → Save.
For Meta's own framing, see the Meta Business Help Center for Shopify. The practical version: Maximum, every time.
Step 4 — Approve permissions and accept terms
Approve every permission Meta asks for during the wizard. Skipping permissions means the Pixel can read data but Shopify can't push events back. Accept terms, click Finish setup, and you're connected.
"Connected" here means the wiring exists. The next four items decide whether the wiring actually carries useful data.
Post-connection: the four items that matter for POD
Most "Shopify to Meta" tutorials end at step 4. That's where the gotchas start. Walk through these before you turn on any spend.
Verify your domain in Business Manager
One-time, five-minute step. Without it, you can't configure event priorities — which means iOS shoppers fall through your tracking. In Business Manager, go to Settings → Brand safety → Domains, add your apex domain, and pick a verification method.
The DNS-TXT method is the most reliable: add a TXT record to your domain's DNS, wait 10 minutes, click verify. Shopify users running on a custom domain can usually do this through their registrar's DNS panel.
Configure Aggregated Event Measurement (AEM)
AEM is Meta's iOS workaround. You rank up to eight events by importance per domain, and iOS attributions only flow for events in that ranked list.
For a POD store, the ranking is almost always: Purchase → InitiateCheckout → AddToCart → ViewContent → PageView. The other slots can stay empty unless you're tracking lead-gen or subscriptions on the same domain.
Set this in Events Manager → Data sources → your Pixel → Aggregated Event Measurement → Configure web events.
Confirm the catalog reached Commerce Manager
Open Commerce Manager and find your catalog. Item count should match your published Shopify SKUs. If it's lower, that usually means variants without prices, missing images, or items in a Shopify status that excludes them from sales channels.
Spot-check three or four items: confirm the price, image, and link are correct. POD product feeds tend to over-sync — old variants you removed from Shopify can linger in Meta until you republish.
Test your Pixel and Conversions API events
In Events Manager, open your Pixel → Test events. Paste your store URL, then run through ViewContent, AddToCart, InitiateCheckout, and Purchase yourself.
You should see each event appear twice: once tagged "Browser" (Pixel) and once tagged "Server" (Conversions API). Two-channel firing on each event is the proof your CAPI is live. Single-channel firing means data-sharing isn't actually set to Maximum.
Advantage+ Shopping campaigns for POD
Meta's Advantage+ Shopping campaigns (ASC) are increasingly where the algorithm's automation delivers results for Shopify stores — and they're worth understanding before you build your first campaign structure.
ASC collapses the traditional campaign/ad set/ad hierarchy and lets Meta's system find buyers across its full inventory. For POD sellers, this has two practical implications:
- Catalog quality matters more, not less. ASC leans heavily on your product feed to dynamically match products to audiences. Stale prices, missing images, or incorrect variant data in your Meta catalog will actively hurt performance in a way that manual campaign structures partially masked.
- Conversion signal quality is the input. ASC optimizes on purchase signals. If your CAPI isn't fully configured (Maximum data-sharing, domain verified, AEM ranked), the algorithm receives a degraded signal set and performance suffers disproportionately compared to manual campaigns.
If you run Advantage+ Shopping campaigns, complete every step in this guide before enabling them. A properly configured CAPI is the foundation ASC requires to work. For campaign strategy beyond setup — bid approaches, audience exclusions, creative testing — see the complete Meta Ads playbook for print-on-demand sellers.
Privacy, consent, and cookie compliance
This section covers a gap that most setup guides omit and that is increasingly enforced.
The Meta Pixel is a client-side tool that runs in the shopper's browser. In most jurisdictions with privacy laws — including GDPR in Europe and CCPA in California — visitors must be informed about pixel tracking and given the option to consent before non-essential cookies fire. Deploying the Pixel without a compliant consent mechanism can violate those regulations.
Requirements vary by region. Review Meta's country-specific cookie consent guidance and consult legal counsel before launch if you sell internationally. Practically, this means:
- Install a cookie consent banner that conditionally fires the Meta Pixel only after consent is given.
- Shopify has native cookie consent tools, and several third-party apps integrate with the Meta sales channel to respect consent signals.
- The Conversions API, running server-side, does not use browser cookies — but it still processes customer data, so GDPR data-processing considerations still apply.
This is not legal advice. Get qualified legal input for your specific markets before you spend at scale.
What to track once it's live
Connection is the easy part. The harder part — and the one that decides whether you stay profitable — is what you do with the data once it flows.
Meta's reporting will tell you ROAS at the campaign level. For POD, that number is misleading on its own. You're paying per-product fulfillment costs that change with every variant, and Meta has no idea what you actually netted.
For a detailed breakdown of why Meta's reported ROAS often doesn't match what you see in Shopify — and how to reconcile the difference — see our guide on why Meta Ads ROAS doesn't match Shopify.
Profit-per-order, not just ROAS
Meta reports revenue. Your real number is revenue minus Printify/Printful fulfillment, Shopify transaction fees, and ad spend. The same campaign hitting a given ROAS on low-margin mugs can be healthy; the same ratio on high-cost hoodies might be barely break-even after fulfillment.
Track contribution margin per order, not gross sales. The cleanest way to do this is to land your Shopify orders, Printify/Printful fulfillment costs, and Meta spend in one place where they can be joined per order. That's exactly what Victor does — see the Facebook Ads ROAS vs. Shopify reconciliation guide for the methodology.
Cross-channel attribution
If you also run Google Ads or organic, Meta will claim conversions that other channels touched first. This is normal — every ad platform claims credit for the same conversion.
What matters is reconciling them. A simple weekly check: total Shopify revenue vs the sum of platform-claimed revenue across Meta and Google. If the platforms claim significantly more than your actual revenue, you're double-counting somewhere. See our Google Ads ROAS vs. Shopify reconciliation guide for the Google side of this problem.
Catalog-level performance
Once Dynamic Product Ads or Advantage+ Shopping campaigns are running, look at performance per product, not just per campaign. POD catalogs are wide and uneven — the bottom tier of SKUs typically contributes a disproportionately small share of revenue. Pause dead weight from your Meta catalog feed before it drains budget.
Event match quality
Inside Events Manager, each event has a match quality score (out of 10). Anything under 6 means Meta can't reliably tie events to user identities, which silently degrades optimization. The fix is almost always: enable Maximum data-sharing (re-check this) or add Advanced Matching parameters.
For the deeper version of this — campaign structure, bid strategies, the audiences POD stores should build — see the complete Meta Ads playbook for print-on-demand sellers. For ROAS targets and attribution models specifically, see the complete guide to Meta Ads ROAS and attribution for POD.
If you want to push beyond connection into custom audiences (lookalikes from existing buyers, retargeting segments by SKU), the next layer is documented in the Shopify Audiences for Facebook Ads integration guide. And for the full architectural picture of how every integration piece fits together, the complete guide to Meta Ads + Shopify integration for POD is the cornerstone.
POD-specific gotchas (Printify, Printful)
Generic Shopify-to-Meta guides assume a brand with a small SKU count and one cost-of-goods number. POD breaks both assumptions.
Variants explode catalog size
A single t-shirt design with 5 colors and 6 sizes is one product to a shopper but 30 variants in your catalog. Meta sees them as 30 items in Dynamic Product Ads. If you don't group them in your Shopify product structure, Meta can show the same shopper "their" mug in five different colors back-to-back, which trains them to ignore your retargeting.
Use Shopify product variants properly. Group color and size under one product, not five separate products. This also keeps your Advantage+ Shopping catalog clean — ASC's dynamic matching works better with properly grouped variants.
Per-variant fulfillment cost
An XL hoodie costs Printify or Printful more to fulfill than a small t-shirt. Meta's reported ROAS averages across all sizes; your real margin can swing significantly between the cheapest and most expensive variant on the same product.
If a campaign looks marginal on average, segment by variant before pausing. The medium tees may be making money while the 2XL hoodies bleed. Victor reads your Printify and Printful fulfillment costs from completed orders and can surface exactly this kind of per-variant margin breakdown — without you building a spreadsheet.
Stock and price drift
Printify and Printful occasionally shuffle blank availability or push small price changes. Your Shopify catalog might say "in stock" while the upstream blank is on backorder. Meta's catalog reflects Shopify, not the actual fulfillment state — so an ad can spend on a SKU that won't ship.
Spot-check stock once a week against the Printify/Printful dashboards.
Refunds and chargebacks lag
POD has higher-than-average return rates because customers can't try the print before buying. Meta credits the conversion immediately; the refund hits weeks later. Your Meta-reported revenue will run hot for the first 30 days of any campaign. Adjust target ROAS upward to compensate, and reconcile against actual Shopify net revenue regularly.
Shopify automation for POD catalog management
If you're managing a large POD catalog across Meta and Shopify simultaneously, consider using Shopify's admin API to automate routine catalog updates — bulk price changes, collection organization, and variant management. For how this works in practice, see our guide on Shopify Admin API store modifications and automation for POD sellers.
Common errors and how to fix them
"Permission denied" or "asset not eligible" in step 2
Almost always a Business Manager permissions issue. The Facebook account you signed in with isn't an admin of one or more of: the Page, the Ad Account, or the Pixel. If you can't connect a desired Facebook Page, check that the business portfolio you are connecting actually owns that Page, or try connecting a different business portfolio.
Open Business Manager → Users → People, confirm your role on each asset, fix permissions, retry the connection.
Pixel fires but Conversions API doesn't
Your data-sharing isn't on Maximum. Open the Facebook & Instagram channel in Shopify → Settings → Data sharing, toggle to Maximum, save. Wait a few minutes and re-test.
Test events show no Purchase event
Two common causes: you used a test card that the checkout flow rejected (the Purchase event only fires on a complete order), or you have an alternate checkout path (Shop Pay express, accelerated checkouts) that bypasses the standard event hook. Run the test with a real card and a normal checkout flow.
Catalog item count is lower than Shopify SKU count
Variants without prices, products without images, and products in a non-active Shopify status all get filtered out. Open the missing SKUs in Shopify, add the missing fields, and re-publish to the Facebook channel.
Domain verification fails
Subdomain mixing is the usual cause. If your store is on shop.yourstore.com but you tried to verify yourstore.com (or vice versa), the DNS-TXT record won't resolve correctly. Verify the apex domain that matches where your store actually lives.
iOS conversions look low after launch
Aggregated Event Measurement isn't configured. Without an event ranking on your domain, iOS users won't report any conversion. Configure the eight-event ranking in Events Manager (Purchase first), and give it 24–48 hours to flow.
Deduplication issues — conversions look doubled
If both the browser Pixel and the Conversions API report the same order without a shared event ID, Meta counts it as two purchases. Shopify's native integration deduplicates automatically. If you've added a third-party CAPI app on top of the native channel, you likely have duplicate reporting — disable one source, then re-test.
FAQs
Do I need both the Meta Pixel and the Conversions API for a Shopify store?
Yes. The Pixel handles browser-side events; the Conversions API handles server-side. Together they cover what iOS, ad blockers, and cross-device sessions break apart. Shopify's "Maximum" data-sharing setting wires both up — you don't need to install them separately. Running both simultaneously is industry standard, but requires deduplication so Meta doesn't count the same order twice; Shopify's native integration handles this automatically.
How long does the full setup take?
Around 30 minutes if you have admin access on both platforms. Add 10–15 minutes for domain verification (DNS propagation), and another 24–48 hours for event match quality scores to stabilize once data starts flowing.
Can I use a personal Facebook ad account instead of Business Manager?
Technically yes, practically no. Personal ad accounts limit access sharing, complicate billing, and don't interoperate with Shopify's integration cleanly. Migrate to Business Manager before you connect — it's a one-time pain that pays back fast.
What if I already have a Pixel from a different setup?
Pick the existing Pixel during the wizard rather than letting Shopify create a new one. Two Pixels firing on the same store double-count events and confuse optimization. If you accidentally created a duplicate, deactivate the new one in Events Manager and re-link Shopify to the original.
Do I need to add the Meta Pixel code to my Shopify theme?
No. The Shopify integration installs the Pixel automatically once the channel is connected. Manual code installs from older tutorials are obsolete and will conflict with the official integration. If you find a hard-coded Pixel snippet from a previous setup, remove it.
What's the difference between Meta Pixel and Facebook Pixel?
Same thing. Meta rebranded "Facebook Pixel" to "Meta Pixel" in 2022. Older articles use the old name, but they're describing the same JavaScript event tracker. Meta also refers to the Pixel as a "dataset" in some parts of Events Manager — same underlying object.
How do I know if my Conversions API is actually working?
Open Events Manager → your Pixel → Test events, run through your store, and look for events tagged "Server" alongside the "Browser" ones. Two-channel firing per event = CAPI is live. Browser-only = data-sharing isn't on Maximum.
Will connecting Shopify to Meta affect my store speed?
Marginally. The Meta Pixel adds a small JavaScript payload on every page load. The Conversions API runs server-side and adds zero browser weight. If you're already running other tracking pixels (Google Analytics, TikTok), the Meta one is in line with industry-standard sizes.
Can I connect multiple Shopify stores to the same Ad Account?
Yes — but use a separate Pixel per store. Multiple stores sharing one Pixel pollutes audience-building and conversion attribution. Inside Business Manager, each store should have its own Pixel and its own catalog, all assigned to the same Ad Account if you're running them under one P&L.
What does "Maximum" data-sharing actually share?
Standard browser events plus hashed customer data (email, phone, name, billing address) plus server-side event forwarding. The hashing is one-way — Meta sees a consistent identifier per shopper without seeing the raw email. This is what enables Advanced Matching, which materially improves event-to-user matching post-iOS 14.5.
Do I need a separate Instagram setup if I already connected Shopify to Meta?
No. The Facebook & Instagram by Meta channel covers both surfaces. Ads run on either or both depending on your placement settings inside the campaign. You only need a separate Instagram setup if you want Instagram Shopping (selling natively inside the app), which is a different decision from running ads.
Do I need a cookie consent banner?
If you sell to visitors in the EU, UK, California, or other jurisdictions with active privacy laws, yes. The Meta Pixel fires non-essential cookies in the browser — deploying it without a compliant consent mechanism can violate GDPR, CCPA, and similar regulations. Requirements vary by region; consult legal counsel for your specific markets.
Should I use Advantage+ Shopping campaigns as a POD seller?
They are worth testing, especially once your CAPI is properly configured and you have purchase history for Meta's algorithm to learn from. ASC relies heavily on conversion signal quality and catalog accuracy — both of which this guide's setup steps address. Without proper CAPI and a clean catalog, ASC has less to work with than a manually structured campaign would.
Connection done. Tracking the bit that decides your margin?
Shopify-to-Meta is the wiring. The harder question — "is this campaign actually making me money after Printify fulfillment, refunds, and cross-channel double-counting?" — is the one that decides whether you scale or quietly bleed.
Victor is an AI employee built for POD sellers. Connect your Shopify, Printify or Printful, and Meta Ads accounts, and ask in plain English: "What's my profit per order on the spring tee campaign after fulfillment?" or "Which Meta ads are losing money once refunds are netted out?"
Victor reads your live data across Shopify, Meta Ads, and your fulfillment provider, proposes the next profit move as a structured action, and — once you approve — executes Shopify-side changes for you. No spreadsheets. No SQL.
Try Victor free